
Thursday, 23 April 2009

Wednesday, 28 January 2009
Plateosaurus Interpretations
Because of these shifts of attitudes in the Paleontological field, the interpretations of what the dinosaurs may have looked like and the way they might have behaved have changed drastically. Today's interpretations show warm blooded creatures, with varying types of musculature which has been brought about by better understanding of the realtionship between bones and muscles. The swan-necked image of sauropods has all but dissapeared, study of the veritbrae in sauropod necks has revealed that such movements would have been all but impossible for them. This discovery in turn lead to the reversal in the idea of their feeding habits, many were low browsers and not tree feeders. This pointed to evidence of herding behaviour. In this way, a small discovery leads to many others which ultimately infuences the way we imagine the animals would have lived.
The species I am focussing on is Plateosaurus. These creatures appeared around 210 million years ago in the Triassic era. Dinosaurs were relatively new to the planet, and the dinosaur ecosystem was not as diverse as it later became. Plateosaurs belongs to the group known a Prosauropods, they were the ancestors of giants like Bracheosaurus and Diplodocus - the most well known sauropods. These early dinosaurs were herbivours, and judging by their bone structure it is generally accepted that this particular species fed on both low vegetation such as horsetail ferns and shrubs as well as higher food sourses such as tree ferns and smaller trees. This diversity of diet of probably was probably an important factor in the success of the species.
The Triassic era was a hard one for life on Earth. There were old two seasons, dry and wet, and all the continents were still joined as the supercontinent Pangea. At this time the Archosaurs were slowly dying out, being replaced in the ecosystem by the emeging Dinosauria.
At this time, South Wales would have been a huge river plain shrouded by mountain ranges. During the lush wet season the greenery and animal life would have flourished, no flowering plants would evolved for tens of millions of years, so this world would have been a largely green one. The landscape would have been dusty scrubland, flat and wide. The river system would have been an artery of green, with forests of coniferous trees and ferns and other plants. This is the world in which Plateosaurus existed, and in the animation I want to show how a footprint made by a single animal at the end of the wet season survived for hundreds of millions of years as a fossil for us to discover.
Visual references:
From the current view of the animal species, I have chosen work done by other people that I feel appropriately represents a realistic view of the species. I am not a paleonologist, therefore I have to use the work of other more qualified individuals as a foundation for my own. Here are images which I feel have captured the creature well:


Tuesday, 20 January 2009
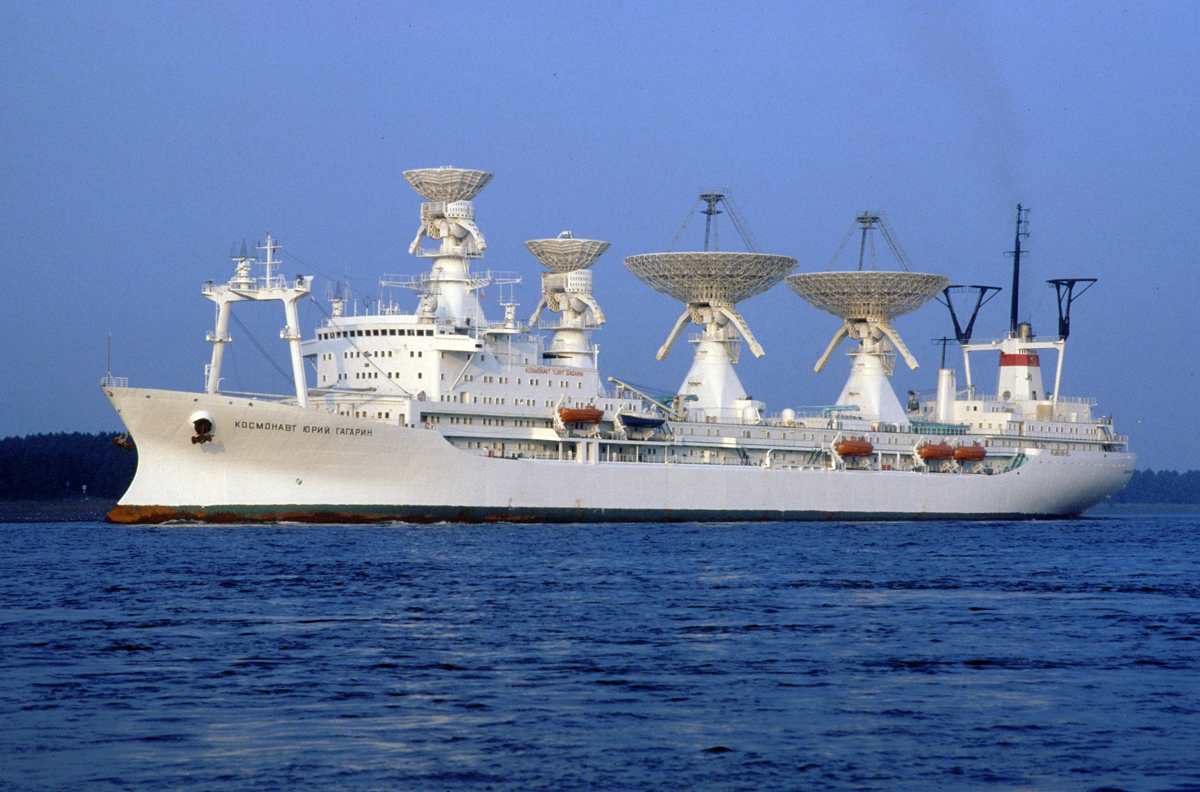
Kosmonaut Yuri Gagarin

It had very distinguishable looks due to two extremely large and two smaller antenna dishes placed on top of the hull.
In Soviet times, the Kosmonaut Yuri Gagarin was the world's largest communications ship and was the flagship of a fleet of communications ships. These ships greatly extended the tracking range when the orbits of cosmonauts and unmanned missions were not over the USSR.
In 1975, the ship was a part of the Soviet-American Apollo-Soyuz joint test program.
The communications ships belonged to the Soviet Academy of Sciences. The maritime part fell under the responsibility of the Baltic- and Black sea shipping. The ships had home ports in the Ukraine (the Kosmonaut Yuri Gagarin and the Akademik Sergei Korolev) so, after the fall of the Soviet Union the ships were transferred to Ukraine – ending their role in spaceflight.
She was sold for scrap shortly after the break-up of the Soviet Union along with another surveillance ship, the Akademik Sergei Korolev.
The History of 1250 scale
http://www.steelnavy.com/1250hist.htm
To summarise what is said on those pages, the hobby as it is today began out of necessity. The first 1200 scale model ships were made by companies who won government contracts to supply the navy with recognition models. This was the basis for the hobby, and several firms did well producing them until the early 1950s. There was a lull in the market between when the scale was used for the military and when it became a hobby. With the revival of the german economy in the 50's, hobbies became an affordable luxury once more and due to the metric system models began to be made in 1250 scale for collectors. The hobby really took off in the 1960's and many of the firms that started then are still successful today, such as Navis Neptun, Hai and Albatros among others. The hobby has grown slowly since then, and is in a state of transition today where the old ways of production and style are being challenged by newer methods and technologies. Together, the two schools of thought could bring wonderful models to the market, however this is unlikely to happen as in every industry there are those who stubbornly cling to the old ways, and mistrust the new. This is natural however, and the hobby will continue to develop.
Major problems facing the hobby are the greying of both collectors and producers, the hobby is quite litterally dying. New blood is scarce as younger people simply aren't interested or don't know. How well producers and retailer adapt to these problems will be the challenge that will decide who goes and who stays on.
Many exellent photos of 1250 scale ship models bith old and new can be seen here:
http://gs61.photobucket.com/groups/h70/7EGAO7QTCZ/?albumview=grid
Mould and cast research
Preparing the RP master:
The machine that I had the ships printed on was the Envisiontech Perfactory; an SLA type 3D printer.
On preparing the masters for moulding I discovered some key issues and pitfalls:
- The parts always have small spikes left by the printer as supporting material. These must be very carefully separated from the component, parts can easily break at this stage. The best approach is to gently run a sharp scalpel blade along the join of the spikes to the part, this will gradually remove them without harming the component.
- Fine parts should not be printed so that they cannot support themselves. For example, the 5 inch gun barrels came out .3mm in diameter. Because they were printed horizontally they had supporting spikes which were extremely difficult to remove. Of the eight that were printed, I only managed to sucessfully prepare three. Next time I would print a similar component vertically to avoid the supporting spikes.
- Some parts may have areas which are not fully hardened, and may break easily. Be prepared to replace them. However if the master is designed to be strong and structurally sound then this happens less.
- The resin used is actually quite strong, and will stand up to significant punishment during the moulding process. This means that quite large undercuts van be present in the mould, as long as the object that has been undercut is quite tough. For example, the upper decks of the destroyers extended out from the main structures, because they were designed to be .4mm thick they were strong enough to be undercut in the mould. If the master comes out, so will the resin.
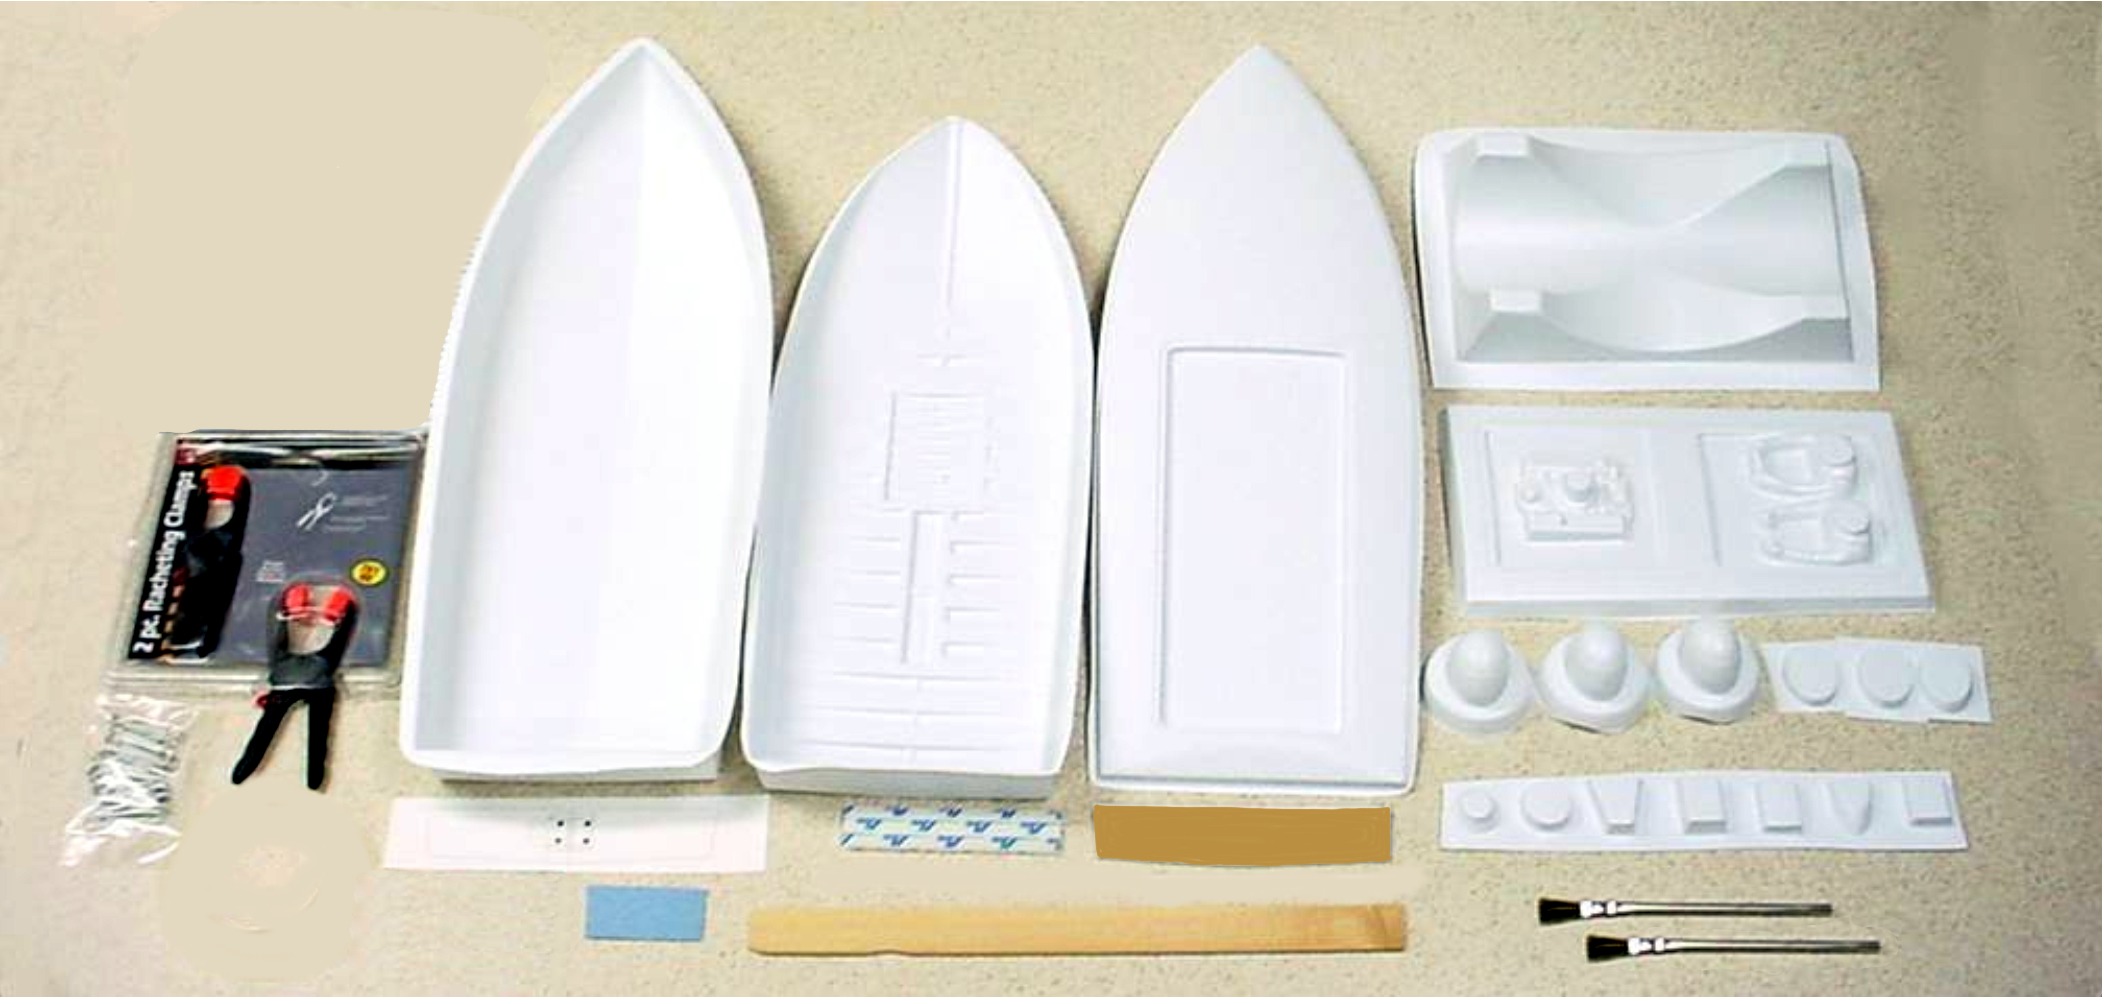
I decided on two types of mould for the kit, an open topped one part mould for the one piece hull and superstucture, and a two part mould for the fittings sprue. Open topped moulds are generally the simplest type, and will do fine for most applications. The imporatant aspects to get right are a watertight join between the mould floor and the master, and a smooth mould floor with no scratches that is a flat as possible.
Two part moulds are more tricky. The masters must be half covered by chavant clay or plastaline. Then the first have is poured, the masters are removed and cleaned, inserted into the new half and waxed then the seconf half is poured. It's much trickier than it sounds. However, I discovered some very handy tricks while making them. Lego bricks are a brilliant mould making gadget, they save material, flat sqaure wall can be built in seconds and they act as locators for the two mould halves.
I first glued all the masters onto a styrene block that would act as the reservoir, then I fixed them to the mould wall and poured molten cavant clay up to the level where i wanted the mould to part. Chavant cap is not really suited to this type if punishment as it turned out, the wax crystalises as the clay cools and also because it is so tough it is tricky to get the masters out in one piece and clean them. Next time I will use softer plastaline. Once the half-mould is built you can make as many halves in silicone as you like. For this model I made five, then removed the masters and after cleaning I inserted them back into the moulds I had just made and poured five second halves. This resulted in five very neat and precise moulds that ended up producing extremely good casts with barely any flash.
Making five hull moulds was relatively easy, as I just took five good casts from the first mould and moulded them. Due to the good quality of the moulds I was able to cast eighty kits in three days!! I am very pleased with the tricks I learned and the success of the moulds, I believe I will be able to get straight on with it when the new masters arrive. This is important because time will be short by that stage.
Tuesday, 6 January 2009
A Question of Scale
Aircraft:
1:144
1:72
1:48
1:35
1:32
1:24
Vehicles:
1:72
1:48
1:35
1:6
Ships:
1:2400
1:1250
1:1200
1:1000
1:700
1:350
1:200
1:96
1:72
These are are not set in stone, but as a rough guide these are the scales to choose from as they appear most often in industry. For this project, given the size of the vessel and the cost of rapid prototyping I have chosen 1:1250 scale. This is a popular scale that will be affordable for me to design the model in.
This particular scale presents a number of issues, chiefly concerned with representation. At this scale detail is more represented and suggested than accurately reproduced. Many parts must be overscaled to allow casting. For example, 5 inch gun barrels are often three to four times their scale diameter in this scale, otherwise they would simply be too fine to cast. Therefore, choice of representation and a measure of artistic liscense is essential when working in this scale to achieve an effective design. I will have to make these decisions as I go along, and desicribe them and theirimportance here.
The Model Kit Industry


Extended Major Project Begins!
Project 1: "Tracking Dinosaurs" live brief from the National Museum of Wales.
In this project I will be producing a short educational documentary about how footprints become fossilized. Many prehistoric footprints of early Dinosauria have been found in Wales. South Wales was a large plain made up of river systems in the Triassic period - about 250 million years ago. During the period of Earth's history the first Dinosaurs appeared. They left evidence in the form of fossilized bones and footprints that can give us clues as to the way that they lived. The purpose of the documentary is to follow the life of the footprint from when it was made by a Plateosaurus, to when it was unearthed by paleontologists - and all the processes it went through inbetween.
My learning aggreement requires me to model the Plateosaurus as accuartely as I can, however I wish to place it in an eductional context that will be attractive to industry at the show.

Project 2: Hobby model kit of the ship "Kosmonaut Yuri Gagarin."
This project is a somewhat unorthodox one. I will be designing a model kit intended for hobbyists, the model will be of the Soviet sattellite tracking ship "Kosmonaut Yuri Gagarin." My learning aggreement requires the digital design as the final outcome, however if time and funds allow I will have the designs rapid prototyped and then mould and cast a few samples for the show.
The first stage is research, which will follow in this log.
Thursday, 27 November 2008
Fur really is murder - Part 3.


Wednesday, 26 November 2008
There's more than one way to skin a cat


Thursday, 20 November 2008
Dem bones dem bones dem dry bones
Ok well it's easy to get a little discouraged sometimes I guess. The rig so far is thuswise:

Yes, it looks pretty. But it's not a very good rig. So I'm starting again.
The biggest problem I'm having is (predictably) the flaoting clavicle bones. Because these move o much in real cats it needs to be present and articulated on the rig. However normal shoulders (like yours and mine) have very little play in them in comparison, with rotation being their main method of movement. A cats move alot more, as well as rotate, this makes it very tough to control and getting the relationship between the shoulder and the rest of the leg right is downright solid.
I have learned alot from the first rig however, and I'm no stranger to starting over from scratch. So I'll start again, and do it my way.
Saturday, 15 November 2008
Tigger takes shape
I've re-proportioned him a little, as he was built more like a panther than a domestic cat, so I've reduced his general beefyness but he's still quite muscular as TB is. Here's a screen shot.

I have found out that the workflow for a furred character is this:
- Model
- Lay out UV's
- Texture/materials
- Fur
- Rig
- Skin
I have also left certain things off the model by request of Steve. To speed things up, I am not required to add an rigged mouth. I.e he will always have his mouth shut. This can be added later. I've also left dtail off the limbs and paws, this can be done with fur and maps instead. this should make him a very efficient, but low res character which would fit Steve's budget in industry.
Wednesday, 12 November 2008
Caturday


Tuesday, 11 November 2008
Everyone hates the crazy frog but....
I think one has to admit that he has alot of character, even if it is intensely irritating.
Sex sells. So do funny animals.
Not technically CG, but well worth a mention:
My persobal favourite from Canada:
Not CG again, but it has cats!
Unfortunately I couldn't find the Injury Lawyers 4 U ad featuring the worst CG eagle EVER. Shame.
Shadow of the (alpha map) colossus

Feux feux fur

"I don't know about that... This is a screenshot I found at Gamespot of White Knight Story:

The hair looks incredibly sharp, but that is more an effort from the modeller, who obviously know how to use alpha map well. But the texture obviously aren't that high-res, and the eyes and the face show some obvious signes of polygons. the fur around his collar also suggest s single layer of texture. This is very nice looking, but no where even close to that image of FFXIII above.
In that FFXIII image, you can see each individual strand of hair, the texture shows absolutely no distortion near the curves, and remain sharp throughout. There are no signs of polygon, as everything is absolutely smooth. And all these things are achieved in a very high resolution - that image is huge. PS3 doesn't have a single game with visual quality even close to that."
You can read the whole thread (if you really have to) here.
Real fake or fake real?


There are serious considerations for both versions. The toon version may be too far from what the client has in mind, but the realistic version is probably out of my reach and skills at the moment. The only way I will find out which is best to do (or how far down the middle to go) is simply to get stuck in and see how it evolves. This is a haphazard, though often effective approach. Either way, time is short and I must get started.
I like to move it move it
Creature Feature Hall of Fame
1: Scrat (Ice Age)

This loveable critter graces many bedrooms in the form of a cuddly toy of some sort. He owes his popularity to the artists who created his character. In design he is classically cute – with big eyes, stubby limbs, a twitchy nose and a big bushy tail. This was interpreted brilliantly by the modellers and renderers, then brought to twitchy life by the animation teams. He also demonstrates how props can be used to bring out character. Scrat is rarely seen without his precious acorn, and his small plotlines revolve around it. All this creates a very loveable character which appeals to everyone.
2: Sully (Monsters Inc.)

Though not technically an animal, Sully is none the less a big furry critter with a lot of personality. He was a technical revolution in that he was one of the first movie characters to use fur effects. I imagine many of the geniuses who developed the fur and hair tools lost a lot of their own in the process. Big and cuddly in design, he is a big teddy bear that children loved. His movements are big, slow and clumsy which is an endearing quality that contrasts with his bright and caring nature. A good realisation of an unusual concept makes Sully an unforgettable character.
3: Tank Evans (Surf’s Up.)

Most stories require a villain, or in the case of Surf’s Up – a big meanie. It’s difficult to choose between the characters in this movie, as they are all so unique and cleverly done. However, for me, tank is a fantastic villain. Happiness and sadness and pretty basic emotions in a CG character, but more subtle traits like arrogance and machismo are far more difficult to portray. Tank carries them off perfectly. Every part of his design is meant to emphasize the proud bully that is Tank, obsessed with winning and with no regard to anyone but himself (and his suspicious attachment to his trophies.) Tank is a perfect bad guy for the movie, and though you love to hate him he’s a very memorable character.
4: Puss in Boots (Shrek 2.)

Puss in boots is especially relevant to me on this project. He is a very good example of a characterised cat, and has a lot of personality that owes a lot to the voice of Antonio Banderas. His most charming aspect is the way he is a pint sized hero, brave and fearless, but still lapses into becoming entranced by dangling objects he can swipe at. He is a cat in every way.
5: King Julian (Madagascar.)

This cheeky chappy was the real star of Madagascar. Ok the penguins were cool too but we’ve already had one of those. One could have cut the rest of the film out and just had a 15 minute short about partying lemurs.
The lemur rendition of “Move it” was a stroke of sheer brilliance, and has probably exceeded the popularity of the original. This party animal behaviour is clearly expressed through Julian. His wide range of facial expression and lanky but energetic gait is augmented by Sasha Baron Cohen’s voice acting.
Julian was one of the few characters who really made an otherwise unimaginative film well worth watching.
6: Boog (Open Season.)

Boog is so endearing because he is such a paradox of form and personality. Though he is a fully grown grizzly bear who looks like he has a mean streak in there somewhere, he is in fact a gentle and domesticated animal. If this wasn’t evident enough he carries a tiny cuddly bear backpack – full of animal cracker treats. His movements and mannerisms are clearly based on real grizzlies, even though the model and fur effects are highly stylised. It’s easy to identify with him, and though he looks tough he is a vulnerable and dependant animal who has to find his place in the tough wild world. It’s this contrast that I think makes him such a great example of a CG animal.
7: The Famous Grouse.

Though perhaps not as big screen as the other characters listed here, I feel he is worthy of mention nonetheless. What I like about this character is that he seems to have grown into his role over time. When he first hit the TV screens, he was seen wandering around the scene, seemingly disorientated as if nobody was sure what he was doing there. It was almost as if they had put a real grouse on a white stage and just let it do whatever. Now in the most recent ads, he is seen with a bottle of the whiskey with an affectionate wing around it. I like this evolution of purpose. Aside from this I like his awkwardness and dizzy movements, he is a very well characterised bird brain.
These are excellent examples of CG animals, and show how artists bring out character through their designs and animations.
